
In order to use Watch-O-Scope, you need a watch test stand. You can either build one yourself, or buy one. We have tested the following one, and here's how you can buy it.
There are a handful of different watch test stands available on-line at AliExpress, of which we have tested the one selected below in this ad:

Clicking the link above will take you to that site, although it will show a different model than is shown above. To see the preferred one, click the one shown as described in the picture. Note that the price's currency displayed depends on where you connect from.
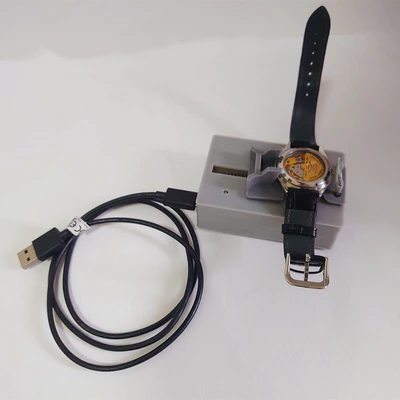
The test stand has two main areas. At the left end is the power switch to turn it on or off, an audio jack to connected it to your computer, and a USB port whose sole purpose is to recharge the battery.
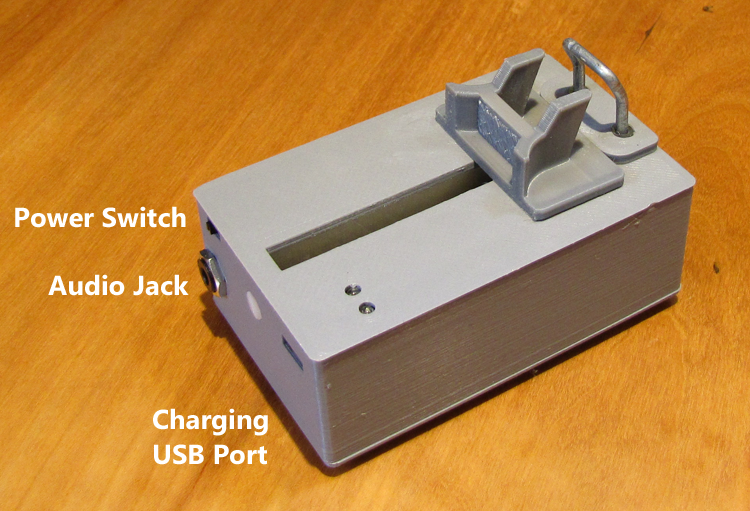
The charging USB port can be connected using a standard USB cable to connect to a computer's USB port for charging. Alternatively, it can be charged from a stand-alone USB power adapter. Neither is included with the test stand. During charging, a blue LED on the test stand will blink. When charging is completed the blinking will stop, and the LED remains on solidly until the charger is disconnected.
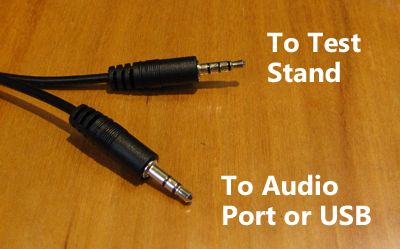 The watch test stand is supplied with the appropriate cable to plug it into
your computer's audio (microphone) input port or an audio USB adapter (one is
included if you need it). This cable is specific to the watch test stand, and
the two ends are subtly different. It will not work if the two ends are
swapped.
The watch test stand is supplied with the appropriate cable to plug it into
your computer's audio (microphone) input port or an audio USB adapter (one is
included if you need it). This cable is specific to the watch test stand, and
the two ends are subtly different. It will not work if the two ends are
swapped.
We have not yet had the opportunity to try it with a computer having a single jack for both audio input and output. In that case, it might be that the cable should be reversed relative to the connection described above.
Finally, the power switch is to turn the test stand on. The rechargeable lithium ion battery inside the test stand lasts much longer than on the DIY amplifier, but it will eventually run down, so it should be turned off when not in use. Fortunately, there is a red LED on top to remind you the test stand is powered up.
To prepare a watch for testing, use your fingers to pull the movable part of the watch holder away from the fixed one. The latter contains the metal pickup that detects the watch sound by being in contact against the watch's case.
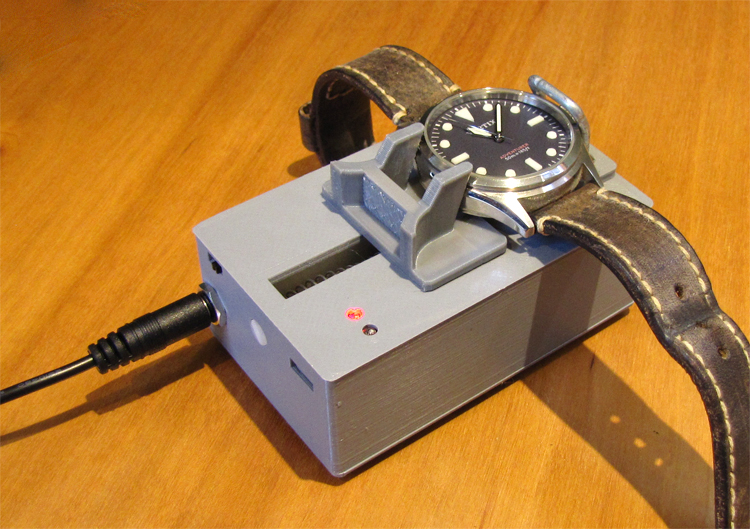
When installing the watch on the stand, ensure that the two opposite sides are between the movable plastic frame, and the fixed metal one. Check that it's not trapped against the base of one side or the other, or both.
Plug the audio cable into the Microphone jack on your computer, or the corresponding jack supplied by a separate audio adapter plugged into a USB port.
Finally, turn on the test stand's power switch. It should now be ready to use with Watch-O-Scope (you may need to set your computer's audio to select the correct audio connection if there's more than one).
If you're unable to see a watch signal, check the following:
The test stand is supplied with rubber feet to minimize the amount of noise detected while testing a watch, but only on the bottom. The home-made watch microphone also has rubber feet, but they are on three sides as well as the bottom, for testing a watch in different directions. It is worth adding such feet to three of the sides of the bought watch stand as well:
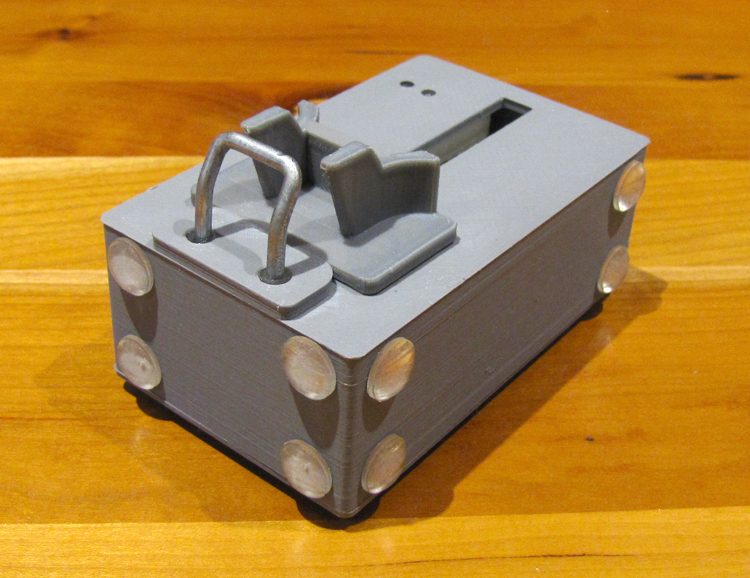
These are self-adhesive, and can be obtained from most hardware stores. Choose approximately 3/8" (10mm) rubber or soft vinyl feet. Only twelve are needed.
In late 2021, the the listing on AliExpress was changed to a test stand that uses USB directly. The version shown in the photos above were of the previous model, which could use either your computer's Microphone jack, or a USB adapter to connect via a the computer's USB port.
So long as your computer has an available USB port, this doesn't affect the ability of Watch-O-Scope to use the test stand. You just need to ensure that Watch-O-Scope is connected to the correct device in the Audio Input Device option in the Settings window.
Copyright © 2014-2022 by Stefan Vorkoetter and Capable Computing, Inc.
All rights reserved. Unauthorized duplication prohibited.
Watch-O-Scope is a trademark of Capable Computing, Inc.
Last updated on Thursday February 3, 2022.